Using IPHost mobile app: quick start
Q: how can I start getting Push notifications on my mobile device, when a monitoring event happens?
A: you would need to have an Android device (running Android 4.4 or higher, connected to Internet) and IPHost desktop installation of version v5.3 build NNNNN or above. Follow the below steps for a quick start.
Quick start prerequisites
The below is assumed for this quick start guide:
- you have a compatible mobile device (running Android 4.4 or above, connected to Internet)
- you have IPHost desktop version v5.3 build NNNNN or above installed and its GUI client available
- you have installed IPHost Mobile app from Google Play
Connect the device
In the desktop IPHost GUI client: choose “Settings > Mobile Devices”, click “Add new…” to start New Mobile Device Wizard. Choose “I want to connect it right now” and click “Next”. A QR code to connect will be displayed:
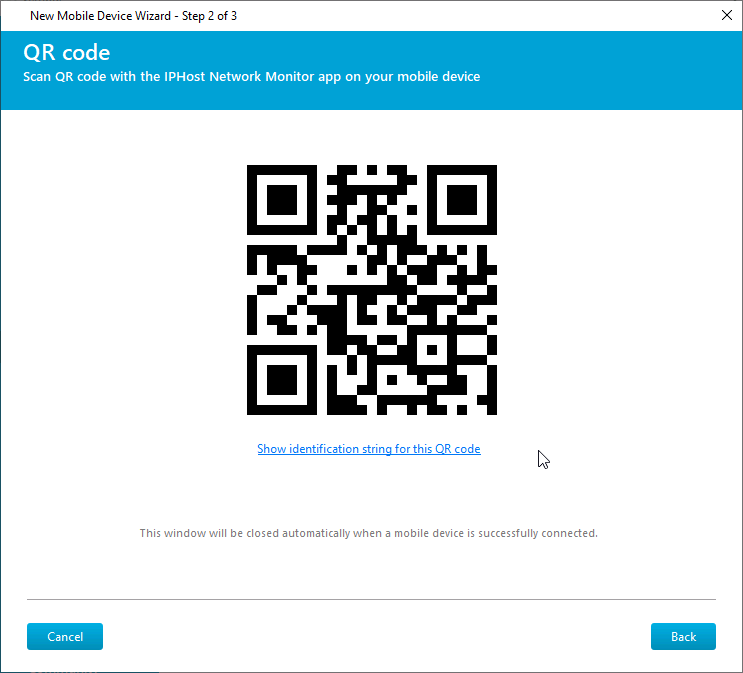
Important: stopping the wizard at this moment will cancel adding the mobile device.
On mobile device, run IPHost app and enter new device name on the welcome screen:
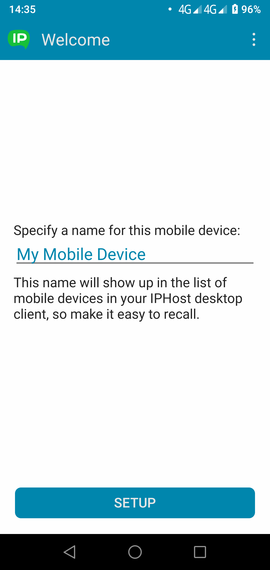
Tap “Setup”. The device will offer to scan the QR code. If IPHost GUI client is available, scan the above QR code, otherwise ask to copy the identification string (click the link below the QR code) and send it to you, to enter it manually on IPHost mobile app:
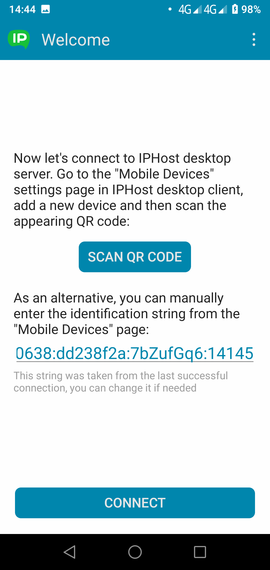
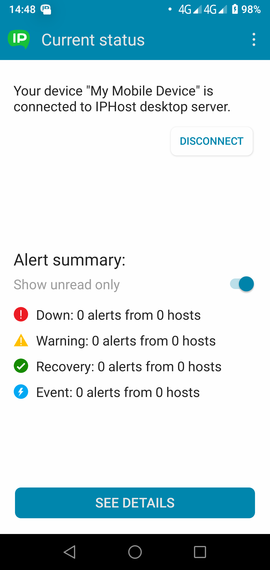
Whichever way to connect is used, please wait while the mobile device connects; it usually takes several seconds. After the connection has been established, mobile device will report it, along with current notifications count:
On IPHost desktop GUI client, step 3 will be selected automatically, as a new mobile device is successfully connected:
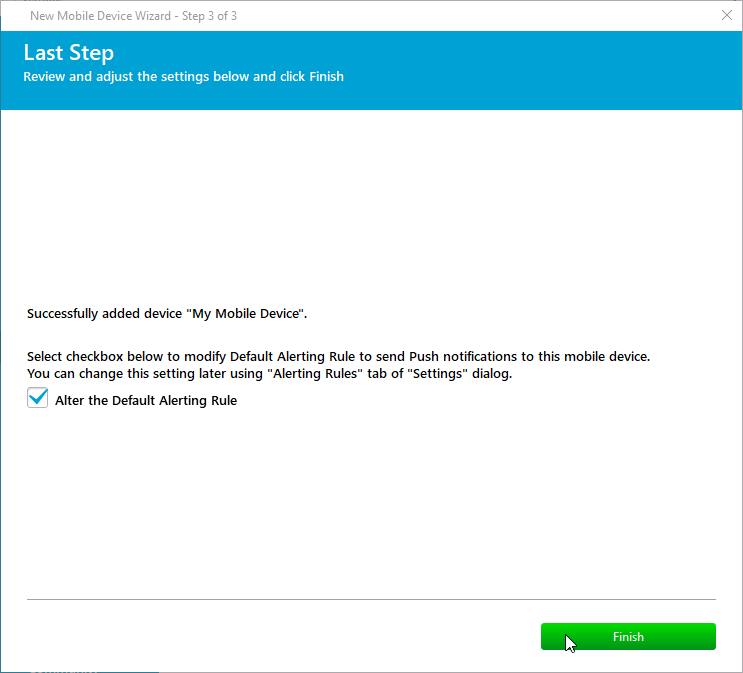
Click “Finish” to complete.
Basically, you are all set now, mobile device is capable of getting Push notifications. You might need to further ensure Push notifications are being received and IPHost isn’t restricted by battery usage settings.
If something goes wrong, just start the mobile device connection anew.
Adjusting mobile notifications
On IPHost desktop client: after the device has been added, if checkbox “Alter the Default Alerting Rule” has been checked, a clone of default alerting rule is created and “Send Push notification” simple action is added to every alert used by default alerting rule. Alerts will look like this:
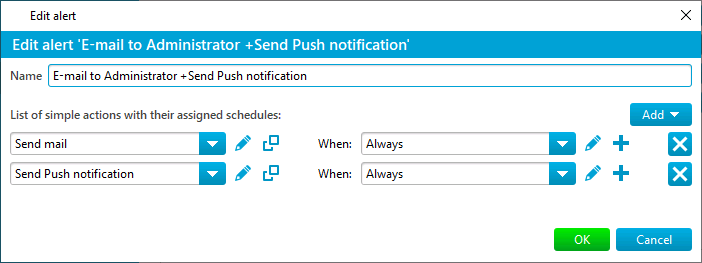
If several mobile apps are connected, the “Send Push notification” simple action can be edited to specify which device(s) should receive the notifications. As usually, alerts can be manually edited to send specific monitoring events alerts to specific mobile devices only, please see details in “Alerting and Actions” document.
On mobile device, alerting details will generally look like this:
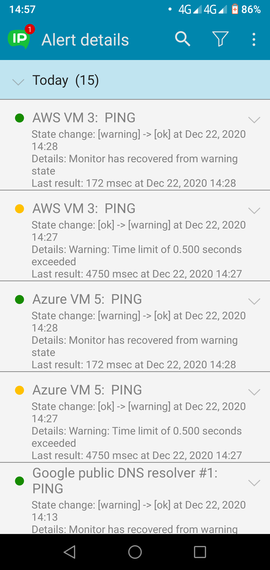
Alerts can be searched (magnifying glass icon) or filtered by type (funnel icon) to only display required alerts.
Configuring mobile app
The “sandwich” (three dots) menu item can be used to open “Settings” menu item:
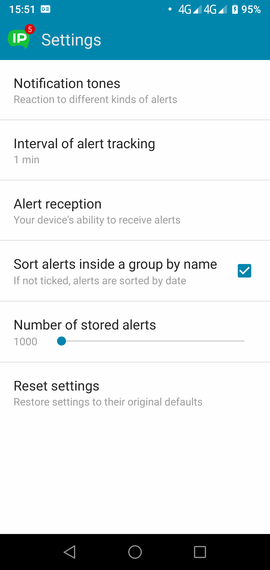
It may make sense to alter default notification tones (by default, the same app sound for every event) and/or tracking interval. Please make sure your mobile device is connected to Internet.
Important: when disconnecting the mobile device (on start screen of mobile app or in corresponding desktop IPHost installation), please make sure to disconnect/delete it on both ends. Currently desktop IPHost client does not track cases when mobile app disconnects.

